Be a doll and make this dal ASAP

Some years ago, my sweetie got this delightful cookbook called “Flavors of India” that includes a ton of delicious, simple, and vegetarian Indian dishes. It was a household staple for years, particularly because it made healthy *and* cheap food that lasted for days.

Then, it got destroyed.

Thanks to the wonders of the Internet, it wasn’t lost forever. My sweetie got another copy and we’ve continued to use that one (and keep it safe) for many more years now, and it’s still as much of a treasure.

Dal-dhokali ingredients.

One of my favorites — but one I hadn’t yet made myself — is dal-dhokali, or toor dal (lentils) with chick-pea flour dumplings. It’s also, dare I say, vegan, so it’s mostly healthy (there’s some oil in the dumplings) but still very flavorful.

It’s not necessarily a quick weeknight meal but it is a lot of passive time so put on a movie favorite or catch up on your podcasts while you make this simple dish.

It looks like sludge, it tastes like awesome.

Here’s what I did, following the recipe other than increasing the spice amounts:

Ingredients

For the dal

  • 1 c. toor dal (split pigeon peas), or any dried split pea or lentil if toor dal is hard to find in your area
  • 10 c. water (yes, it sounds like a lot, but it’s works)
  • 1 ½ t. salt
  • 1 t. turmeric
  • 1 t. coriander powder
  • 1 t. cumin
  • ½ T. grated ginger
  • 1 T. tamarind concentrate, or if it’s hard to find in your area, the cookbook suggests using a tablespoon of lemon juice and a teaspoon of sugar in its pace (which given its tart/sour flavor, it seems appropriate)
  • 1 large tomato, chopped
  • 1 T. oil
  • 1 T. black mustard seeds
  • 4 whole cloves
  • 2 dried hot peppers, I used chile de arbol
  • Cooked rice, for serving

For the dumplings

  • ¼ c. chick pea flour (besan)
  • ¼ c. whole wheat flour
  • 1 T. oil, plus more for mixing
  • ¼ t. salt
  • 2 pinches cayenne
  • 5 to 7 t. water, more as needed to make dough

Directions

Wash and rinse the dal, rubbing it in your hands to remove the oily coating, while bringing the Dutch oven full of the 10 c. water to a boil with the salt.

Once the water is boiling, add the dal and return to a boil over high heat. Reduce to medium-high, and cook the dal uncovered for 10 minutes. Then, reduce heat and cook, covered, for another 30 minutes, stirring occasionally.

Meanwhile, make the dumplings. Mix together the two flours with your hands; add the salt, cayenne, and vegetable oil. Crumble the mixture together in your hands. Add 5 t. of water and continue to mix with your hands or a fork until a dough begins to form, adding more water a teaspoon at a time as necessary. Imagine making a pie crust and get it to that consistency. Once ready, set aside.

After the 30 minutes has passed, add the spices, ginger, and tamarind (or substitute) to the dal mixture, and simmer another 10 minutes, uncovered, while you roll out the dumpling dough.

To ready the dough, use oil instead of flour to keep the mixture from sticking. Add a small amount to your hands and knead for a few minutes in your hands until smooth. Add small amounts of oil to the rolling surface and rolling pin, and begin to roll out the dough, again, like a pie crust. Roll until thin like a plate (how the cookbook describes it), about ¼ inch. Use a pizza cutter or sharp knife to cut into 1 inch squares.

Add the dough a few at a time, to ensure they do not stick together, and stir to separate.

Add the tomato, and continue to simmer while preparing the final spice addition.

In a small saucepan or frying pan, heat a tablespoon of oil, and add the mustard seeds, whole cloves, and hot pepper (broken into pieces). As the oil heats, the mustard seeds will pop. Once they stop popping, about 1 to 2 minutes later, remove from heat, and dump the contents (with the oil) to the Dutch oven.

Stir the dal mixture together a few more times, and then cover the Dutch oven once more, and cook for another 20 minutes on low heat, stirring about every 5 minutes so that the dumplings do not stick. Once the dumplings are softened, serve with rice, and enjoy!
Bread and bourbon for the holiday

I was looking for a nice and light dessert to make for this holiday weekend, and instead came up with one of the heavier things I could have selected. I couldn’t help it. I was inspired by last week’s recipe and its abundant use of bread in the Dutch oven.

You guessed it, I made a bread pudding.

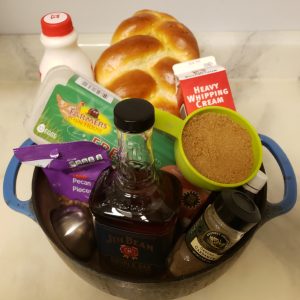
Bourbon pecan bread pudding ingredients.

Even better, it has bourbon and pecans, two of my favorite dessert ingredients. I’m a sucker for a bourbon pecan pie every Thanksgiving, so I couldn’t resist.

The recipe also gave me a good excuse to track down where I could find challah in Ames, and an opportunity to learn that the average loaf of bread is equal to one pound. (The recipe called for a pound, and I had no idea how to guess the weight of a loaf; turns out it’s pretty easy to find.)

It all turned out perfectly, and bonus, I got a whole bunch of mostly egg white scrambled eggs as the recipe called for a ton of only egg yolks.

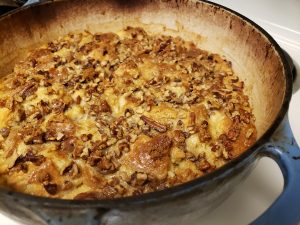
Bread pudding so good it’ll make you challah!

Here’s what I did, mostly following the recipe in my Cook It In Your Dutch Oven cookbook:

Ingredients 

Bread pudding

  • 1 loaf/1 lb. challah bread chopped or torn into 1 in. chunks (preferably slightly staled)
  • 9 egg yolks
  • 2 ½ c. whole milk
  • 2 ½ c. heavy cream
  • ¾ c. brown sugar, packed, plus 2 T., divided
  • ½ c. bourbon
  • 1 T. vanilla
  • ¾ t. salt
  • ½ t. cardamom (optional)
  • ½ c. pecans, chopped

Sauce

  • 7 T. heavy cream
  • ½ c. brown sugar, packed
  • 2 ½ T. butter
  • 2 T. bourbon

Directions

In the Dutch oven, mix together the bread pudding ingredients: milk, cream, egg yolks, ¾ c. brown sugar, bourbon, vanilla, salt, and cardamom, if using. Stir until sugar is dissolved and mixture is well combined. Fold in the bread chunks, and let sit for about 30 minutes to let the bread absorb the milk-egg mixture (stirring halfway through).

Heat oven to 325 degrees.

After the half-hour, top the mixture with the pecans and sprinkle on the 2 T. brown sugar. Bake in the oven, uncovered, until center is set, about 50 to 70 minutes.

Meanwhile, make the sauce by melting the remaining sugar with the 7 T. heavy cream in a small saucepan over medium heat, stirring frequently. Once the mixture boils, remove from heat, and add the butter and bourbon. Stir to combine.

When the pudding is ready, let cool slightly, stir the sauce mixture again, serve with sauce, and enjoy! Happy Labor Day weekend!!

Christinia’s first cooking class

One thing that has become a staple of vacationing with my mom’s side of the family is taking a cooking class. Though I was not there, I will not soon forget the pictures my mom sent of my Polish maternal grandma learning to make sushi.

We’re nothing if not adventurous.

Pappa al pomodoro ingredients. Decidedly not sushi.

As I’m about to embark on a girls trip with my mom and aunt to a new foreign land, including a cooking class of course, I’m reminded again of the first time our family’s first time taking a class. The poor souls who had to wrangle about 10 of our clan did not have an easy task, especially as the wine flowed freely.

But 12 years later, I still make the recipes that we learned that day, and I still remember the wines that we tasted. Thankfully for the purposes of this blog, the recipe I make most often, pappa al pomodoro, (and was also one of the first dishes I shared with my sweetheart whom I’ll be missing dearly), can be made in a Dutch oven.

I haven’t made many changes over the years. Why mess with this Italian classic?

BRB, there’s more in the fridge right now.

Here’s what I did on my most recent venture:

Ingredients

  • 4 ½ lbs. tomatoes
  • 2 leeks, sliced
  • 1 garlic bulb, about 20 cloves, peeled minced
  • 1-2 packages fresh basil, chopped
  • Red chili flakes, to taste (about 2 pinches is what I use)
  • 1 loaf bread, preferably stale
  • Olive oil
  • Salt and pepper

Directions

Peel the tomatoes — my method is to cut a cross in the bottom and put them in boiling water for a minute or less before transferring them to an ice bath. (I didn’t say it was easy, just a way to use tomatoes!) Then, chop roughly and use a food processor or blender to puree the tomatoes.

Separately, in a large Dutch oven, heat olive oil over medium heat and then add the leeks and cook for about 5 minutes until translucent. Add the garlic and pepper flakes and cook for about another 1 minute.

Add the tomato puree to the Dutch oven, and bring to a boil. Cover and cook for about an hour. Add the chopped basil and salt and pepper to taste.

Continue to cook for about another half-hour. When the tomatoes are cooked, chop or tear off pieces of bread and place in the soup until it is thickened to taste. (I used about ⅔ of a small French loaf.)

Ladle the soup into bowls and top with additional olive oil and salt and pepper, if desired, and enjoy!

Programming note: I will be traveling, mostly out of the country, for the next few Fridays, BUT I will still be keeping my blogs updated as I worked in advance to ensure I kept up with posting weekly. However, if any technical difficulties or best laid plans do not work out and I go without posting, please be understanding and know that I’ll fix anything when I return.

Chicken curry a perfect weeknight dinner

Like many of my recipes, this one was given to me by my mother, has been among my staples for years, and has been endlessly adapted until the original recipe is more of a suggestion than a specific direction.

So, I figured this year was the perfect time to write out what I actually do to make chicken curry versus what the recipe I use calls for.

Chicken (and vegetable) curry ingredients.

I started adapting this one from the start out of necessity. I was poor and prefer chicken breasts, but the original calls for 3 pounds of chicken meat. Maybe I could have afforded that if I bought a whole chicken but as it was, I wanted to make a meal that lasted for days, and I was more likely to eat a boneless dinner.

So, I halved the amount of meat and then substituted in vegetables.

Now that I can afford 3 pounds of meat, it still seems excessive. So, I still make it with a mix of meat and vegetables. My list of vegetables changes but I like cauliflower and carrots with curry, even though they’re not usually my favorites. Peas and peppers rounded out the list this time, but anything works.

I also probably end up adding more than 1 ½ lbs. of vegetables because I don’t quite measure what goes in. I just eyeball it, including in the suggested amounts below.

Otherwise, I tweak a few other things from “The Curry Book” recipe my mom Xeroxed many years ago for me to enjoy.

So much curry goodness.

Here’s what I did:

Ingredients

  • 4 T. unsalted butter (or ghee, if you have on hand)
  • 1 medium onion, halved and sliced
  • 3 T. minced ginger
  • 1 T. minced garlic
  • 1 ½ lb. chicken breast, chopped into bite-size chunks
  • 2 c. cauliflower, chopped
  • 1 medium carrot, chopped
  • 1 bell pepper, chopped
  • 1 c. sugar snap peas (or just frozen peas)
  • 3 T. curry powder
  • ½ T. ground cumin
  • 2 t. ground coriander
  • Salt and pepper, to taste
  • ⅔ c. plain yogurt
  • 2 T. lemon juice
  • Scallions, optional for serving
  • Cilantro, optional for serving

Directions

Heat the Dutch oven on the stove over medium heat, and add the butter. Add the onion, cauliflower, carrot, and bell pepper, and cook for 3 to 5 minutes until just starting to soften. Add the chicken and cook until mostly cooked through. Add peas, ginger, and garlic and cook another minute.

Meanwhile, in a medium bowl, combine the curry powder, cumin, coriander, salt, pepper, yogurt, and lemon juice, and stir until well mixed. Scrape the yogurt mixture into the Dutch oven, and toss to combine.

Reduce heat to low, cover, and cook stirring occasionally, for about 30 to 35 minutes until chicken is cooked through and the flavor has combined. Serve on rice, with scallions or cilantro if desired, and enjoy!


Don’t be a drip, make this beef recipe

I don’t often say this, but thank God for air conditioning. I’m cold-blooded by nature so if I’m just sitting and the A/C is on, I’m under a blanket or wrapped in a cardigan.

But this week’s recipe called for the oven to be on for about 5 hours, and I’m pretty grateful that I did not have to heat an already scorching house.

Even though the drip beef I made (based on a Pioneer Woman recipe my sweetie came across) warmed the house for one day, the best part about it is that we didn’t turn on the oven for the next several days as we made our way through the leftovers.

Drip beef ingredients.

The microwave and toaster took care of reheating our many, many drip beef sandwiches.

The Pioneer Woman recipe gave two different ways to make this but there wasn’t a question in my mind that I’d be making the one with pepperoncinis. Even better that it was with loaded with Italian herbs as well.

I did, however, snag the sliced onions from the other recipe and add them to this one. It was not particularly noticeable but I was still glad for the little bit of onion flavor added.

The recipe was really easy, put together in less than 5 minutes, and checked only occasionally over the hours it sat in the oven. The hardest part was using forks to shred the beef, but with the A/C on, for me, it wasn’t too bad to stick my face over the Dutch oven. Besides, if done right, the meat should shred with very little effort.

I’m not usually a big beef person but this was a treat. We finished the 3 pounds we made in a few short days. Amazing.

I wish there were still some left. 🙁

Here’s what I did, tweaking the recipe slightly:

Ingredients

  • 2.5 to 4 lbs. beef chuck roast
  • 4 T. butter
  • 1 onion, halved and thickly sliced
  • 2 c. beef broth
  • 1 T. dried basil
  • 1 T. dried oregano
  • 1 T. dried thyme
  • ¾ T. dried rosemary
  • Pepper, to taste
  • 16 oz. jar pepperoncinis, with juices
  • Deli rolls, toasted (for serving)
  • Cheese slices (provolone worked well), optional (for serving)

Directions

Heat the oven to 275 degrees. Meanwhile, over medium heat, melt the butter on the stove and then add the onion slices. Cook for 3 to 5 minutes until just starting to brown.

Turn off stovetop. Add the remaining ingredients to the Dutch oven, except the rolls and cheese if using.

Cover and bake in the oven for 5 to 6 hours until the meat is very tender and starting to fall apart. If it’s not yet tender, keep cooking at 30-minute intervals until tender.

Remove from oven and shred meat with two forks, leaving no large chunks. Serve immediately or keep warm on the stovetop until ready to eat, and enjoy as sammies.

Beer + bacon = bueno beans

We’ve had a bag of dried pinto beans sitting on a shelf for a few months, which neither of us now remembers why we bought it.

So, when I thought about making Mexican rice, I figured I may as well come up with a recipe for using those pinto beans.

Borracho beans recipe.

Homemade bean and rice burritos with some extra cotija we also had lying around sounded like a perfect dinner to me.

I just needed the beans recipe. Thankfully, Homesick Texan was right there with three ways to make pinto beans, each building on the recipe before it. Because I always do too much, I of course, opted for the third one that had all the flavors and ingredients, and took the most time.

These beans were not meant to be made for a casual weeknight dinner, but the leftovers definitely will, and have.

I mostly followed the recipe but I decided against buying two different kinds of pork and met in the middle with thick-cut bacon. I also reduced the jalapenos and replaced one with a poblano to keep the spiciness to medium (It probably would have been fine but my way was good for me). I also made an error in recipe-reading so an adequate substitute is provided.

Best beans ever.

Here’s what I did, based on the borracho beans recipe from Homesick Texan:

Ingredients

  • 1 lb. dry pinto beans, soaked overnight
  • 3 cloves garlic, minced
  • 1 medium onion, diced
  • 1 lb. thick-cut bacon, divided (I used Beeler’s)
  • ¼ c. jalapeno pickle juice
  • Salt, to taste
  • 1 (14 oz.) can diced tomatoes, with the juices (I forgot this ingredient so substituted ½ pint cherry tomatoes and 1 c. vegetable broth)
  • 2 jalapenos, seeded, stemmed, and roughly chopped
  • 1 poblano pepper, seeded, stemmed, and roughly chopped
  • 2 chipotles in adobo, chopped
  • 1 c. cilantro
  • 1 (12 oz.) bottle Modelo Negro or similar dark beer

Directions

Chop up all but 4 strips of (uncooked) bacon and add to a Dutch oven on medium heat. Add onions, garlic, and salt, as desired. Cook for 3 to 5 minutes. Drain the beans and add them to the pot with water to cover by about 2 inches. Bring the pot to a boil.

Cover, reduce heat, and simmer for about an hour. (At about a half-hour, I covered partially as I had added too much water, so check water levels and adjust as necessary.)

Meanwhile, cook remaining 4 pieces of bacon. Add the cooked bacon pieces to a blender with tomatoes (or tomatoes and broth, as it were), jalapenos, poblano, chipotles, and cilantro. Blend until smooth, about 1 minute. Once beans are mostly cooked through, after an hour, add the blended mixture to the pot.

Cook another 20 minutes, covered or uncovered as appropriate to adjust liquid level to your choosing. Add beer about 10 minutes before ready; add jalapeno pickle juices, about 5 minutes before ready, and simmer uncovered.

Let cool slightly and enjoy with more beer, and perhaps some Mexican rice.

Weeknight Mexican rice

Taco nights are a wonderful weekday staple in our household, as I suspect they are in many. It’s so simple to whip up, especially when so much already comes pre-packaged and ready.

Our taco nights have become slightly less simple once we reduced our salt intake and therefore actually realized how much salt is contained in those pre-packaged items.

The low sodium beans are easy enough to come by, and a homemade taco seasoning mix can be made in bulk. Skipping out on my salty Spanish or Mexican rice, however, has been a source of frustration.

Mexican rice ingredients.

My sweetie has mostly taken up the duties of making Mexican rice so it’s still a no-fuss process for me. And if I’m being totally honest, the work that goes into homemade, healthier Mexican rice is only slightly more than dumping box contents into boiling water. After all, the rice part takes equally long to cook and is equally easy to ignore.

The worst part of the homemade rice is cutting a carrot and an onion; in other words, not all that much work.

My sweetie has kept the rice flavorful, without the salt, by adding a homemade broth. He has also started cutting out the addition of tomato and tomato paste. Since I was on duty this time, I made it my way.

So tasty, and less salty.

Here’s what I did:

Ingredients

  • 2 T. olive oil
  • 1 medium onion, chopped
  • 1 medium carrot, chopped
  • 2 cloves garlic, minced
  • 1 medium tomato, chopped, optional
  • 1 c. medium grain rice
  • 2 c. homemade vegetable or chicken broth (or water)
  • 1 c. frozen peas
  • 2 to 3 T. tomato paste

Directions

Add the oil to a Dutch oven on medium heat. Saute the onion and carrot for 3 to 5 minutes until just starting to soften. Add the garlic, tomato, if using, and the rice. Saute for another 3 to 5 minutes.

Add the broth and bring to a boil. Cover and cook on low heat for 12 to 15 minutes, until the rice is nearly done and the broth is absorbed. Add the peas and tomato paste, stir to combine, re-cover and cook until the peas are cooked through and rice is ready, about another 3 to 5 minutes.

Fluff the rice and enjoy with tacos … or next week’s recipe.

How green was my shakshuka

I was looking for another savory breakfast food when I was reminded that for years I’ve thought about making the Middle Eastern egg and sauce dish called shakshuka.

There were no hard-to-find ingredients; it just never quite made the cut when I was looking for something new to try. Until this week.

Green shakshuka ingredients.

My now-beloved Cook It In Your Dutch Oven cookbook even had a recipe all ready for me. Sure, it’s a different take than the traditional — it has a green sauce rather than a red tomato-based one. But that sounded even better. I can always use more greens in my diet.

The recipe turned out fine, if not my favorite. It calls for adding herbs in at the end, though I think adding them to the base sauce and then again at the end would be better — so that more of their flavor seeps into the sauce but also has the fresh zip that their late addition adds. (I should add that my sweetie quite liked the dish so maybe I just don’t appreciate greens as much as I should.)

Other than that, be prepared to buy a lot of Swiss chard, and preferably the kind without red stems if you want it to look vibrant green rather than my brownish-green.

Look at all those beautiful herbs. Noms.

Here’s what I did, roughly following the recipe (though changing some proportions):

Ingredients 

  • 3 bunches Swiss chard, stems removed and reserved and leaves chopped
  • 12 oz. baby spinach
  • ¼ c. olive oil, divided
  • 1 large onion, chopped
  • 6 garlic cloves, minced
  • Salt, to taste
  • 2 t. ground coriander
  • ½ c. vegetable broth
  • 1 c. frozen peas
  • 2 T. lemon juice
  • 8 eggs
  • 4 oz. feta cheese, crumbled
  • 2 T. chopped dill (I recommend more for sauce)
  • 2 T. fresh mint (I recommend a little more for sauce)
  • 1 t. dried Aleppo pepper, optional (I had on hand but it’s a mild crushed pepper so regular crushed pepper isn’t a good substitute unless you want to add a little spice)

Directions

Chop chard stems to yield 1 cup. Discard the rest or save for another use.

Heat Dutch oven on medium heat. Add 2 T. olive oil. Add the chard stems, onion, and a pinch of salt. Cook until softened and lightly browned, about 7 minutes. Stir in the garlic and coriander, and cook for about another minute.

Add the chard leaves and spinach (I had to do it in batches so they would wilt down), and cook until wilted but still green, about 3 to 5 minutes. Here I’d recommend adding some herbs for more flavor, to taste. Remove the mixture from heat and add 1 to 1 ½ c. of the mixture to a blender and blend until smooth, about a minute. Stir the blended mix back into the Dutch oven.

Add lemon juice and peas, and stir.

Place back on heat, medium to medium-low. Make 4 indentations in the mix and crack 2 eggs into each indentation. Sprinkle with Aleppo pepper, if using, and more salt as desired. Cover the pot and cook until egg whites are just set, 5 to 10 minutes (You have to keep a close eye on it). Remove from heat and let sit, covered, until the whites are fully set, another 2 to 4 minutes.

Add the herbs, feta, and drizzle with more olive oil.

Serve with crusty bread and enjoy!

Ratatouille any which way

I’ve talked about my love of Ratatouille before, both the movie and the food item. The movie has the message of “Anyone can cook,” which is to say not everyone can do it but that one’s station in life — even as a rat — can’t dictate whether one is a great chef.

Ratatouille ingredients.

A great chef I am not but I take comfort in that, and many other, life lessons offered by the Pixar classic.

As I’ve come to love the French dish almost as much as the move, I’ve also come to realize it’s an appropriate recipe to highlight the movie’s message and theme. The dish is a humble stew that also can be made to be served at the top restaurant in Paris.

If anyone can can cook, ratatouille shows that simple ingredients can make for an impressive meal no matter which way you make it.

I found last year that I loved making this traditional stew-like dish as a tian on a sheet pan. But in making it in my Dutch oven this year, I was reminded that it also works really well in its stew-ish form. While it mirrors a hearty stew, it is still exclusively vegetables and herbs and spices, with a little bit of (OK, a lot of) olive oil, which makes it light even on a summer night. Also, it doesn’t need to cook for hours upon hours. It’s a half hour or so in front of a stove top, not bad in the air-conditioned house.

It’s practically perfect, especially for the upcoming Bastille Day!

So healthy and yet so scrumptious.

Here’s what I did:

Ingredients

  • 5+ T. olive oil
  • 2 medium onions, chopped
  • 7 garlic cloves, chopped
  • 1 large eggplant (1 1/2 to 2 medium), chopped
  • 2 medium zucchinis, chopped
  • 2 medium summer squash, chopped
  • 1 red bell pepper, chopped
  • Salt, to taste
  • 1 T. thyme (the recipes often recommended whole sprigs to be removed; I just used dried)
  • 2 T. dried basil  (I’d prefer fresh but I had some dried on hand)
  • 1 T. dried oregano
  • ½ T. red pepper flakes (optional)
  • 4 to 5 medium tomatoes, chopped
  • 3 T. tomato paste

Directions

Add about 2 T. of oil to a large Dutch oven on medium heat. Add the onions and cook for 3 to 5 minutes until beginning to turn translucent, stirring occasionally. Add the garlic and cook for another 2 minutes. Add another about 2 T. of oil and the eggplant. Cook, stirring occasionally, for about 8 to 10 minutes, until beginning to soften. Add another about 2 T. of oil, the zucchini, summer squash, and bell pepper. Cook, continuing to stir occasionally, for another 5 to 10 minutes until the zucchini and squash are mostly cooked through. Add the tomatoes, herbs and spices, and tomato paste, and cook for another 5 minutes, covered, until all the vegetables are cooked through and the mixture looks stew-ish.

Let cool slightly (it stays hot for awhile), and enjoy with some fancy bread!

It’s summer, time for fruit cobbler

As soon as summer hits, it’s only a matter of time before I start buying up berries (and also often peaches). As much as I love vegetables, I’m not overly fond of fruit. Sure, I like it OK, but most fruit items in my cupboard or refrigerator are as likely to go bad as I am to eat them before they rot.

But I have my favorites.

I love on-sale cherries, too-hard white peaches, and berries in the summertime.

So, I couldn’t help but buy up blackberries when they were on sale and make it into a Dutch oven cobbler.

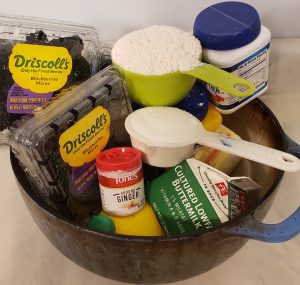
Blackberry cobbler ingredients.

I consulted no fewer than three recipes to come up with my perfect summer dessert, but none of them were exactly what I was looking for. My sweetie suggested blackberries among the berries, and none of the recipes quite worked. Most were, of course, for peach cobblers, which called for cinnamon and often nutmeg. Betty Crocker wisely suggested skipping that step (hers only called for cinnamon) if one were making blueberry cobbler. I felt the same should be true of blackberries.

But I also thought it needed a little something more. Maybe true, maybe not, but I have to say I quite liked my ultimate addition: a small sprinkling of ground ginger.

I admit this cobbler won’t be for everyone. I skimped on the sweet, leaned into the tartness, and added the spice. But my sweetie and I devoured the whole thing with glee and in record time for us two savory-food lovers. It was a real treat.

*drool*

Here’s what I did:

Ingredients

  • 8 T. (1 stick) butter, divided
  • 4 pints (about 5 c.) blackberries
  • 6 T. sugar, divided
  • 1 T. lemon juice
  • 2 t. cornstarch
  • 1 t. salt, divided
  • 1 t. ground ginger
  • 1 c. flour
  • 2 t. baking powder
  • ½ to ¾ c. buttermilk

Directions

Heat oven to 400 degrees.

On the stovetop, melt 4 T. butter in a large Dutch oven over medium heat. Add the blackberries, 2 T. sugar, ½ t. salt, and the ginger, and cook, stirring occasionally for 5 to 6 minutes. Meanwhile, mix together the lemon juice and cornstarch in a small bowl or large measuring cup. Once the blackberries have started to break down, add the cornstarch mixture and stir to combine. Turn off or remove from heat.

Mix together the flour, baking powder, 2 T. sugar, and remaining ½ t. salt. Cut in the remaining 4 T. of butter using a pastry blender or 2 knives or your fingers, until small chickpea-sized chunks form. Add ½ c. buttermilk and stir with a fork until combined to form a wet shaggy dough, adding more buttermilk as necessary.

Drop spoonfuls of the dough on top of the blackberry mixture (it’s OK if some open spots show through). Sprinkle the remaining 2 T. on top of the mixture, and carefully place the Dutch oven, uncovered, in the oven. Bake for about 20 to 22 minutes, until the cobbler on top is lightly golden brown. Remove from oven, let mostly cool, and enjoy (a la mode, if desired)!