After my first week of making rolls, and absolutely loving them, I couldn’t resist making more when I came across a cinnamon roll-like recipe that included the delightful mixture of “orange cheesecake” and “breakfast.”
Orange cheesecake breakfast rolls.
Times being what they are, cheesecake for breakfast sounded like a really good idea to me.
Plus, I miss baking bread.
Once again, this one is a bit time-consuming, even if much of it isn’t active time, so another one to make on a weekend day or over a couple of days. However, like the savory rolls from the start of this year, these were amazing and disappeared quite quickly from our fridge.
Though the cheesecake filling and orange glaze do not use any cinnamon or other similar spices, the process is very much like a cinnamon roll: making the dough, letting it rise, making the filling, wrapping the filling in dough, cutting into rolls, letting it rise, baking, and then coating in a glaze, and then devouring.
Rolls? Sweet.
Here’s what I did, slightly altering a Taste of Home recipe:
Ingredients
For the dough:
4 ½ t. (2 packages) active dry yeast
¾ c. warm water (about 110 to 115 degrees)
1 ¾ c. warm milk (about 110 to 115 degrees)
¾ c. sugar
2 large eggs
3 T. butter, melted, plus more for greasing
1 ½ t. salt
7 to 8 c. all-purpose flour (I needed a little more, but YMMV)
For the filling:
8 oz. (1 package) cream cheese, softened
½ c. sugar
2 T. orange juice concentrate, thawed
½ t. vanilla extract
For the glaze:
2 c. confectioners’ sugar
4 T. orange juice (from one orange)
1 t. grated orange zest (from one orange)
Directions
For the dough, dissolve the yeast in warm water. Add the milk, sugar, eggs, butter, salt, and 5 c. flour. Stir in enough remaining flour to form a firm dough. Turn the dough onto a floured surface and knead until smooth and elastic.
Place in a greased bowl, turning once to grease the top of the dough. Cover and let rise in a warm place until doubled, about an hour.
In a small bowl, beat the filling ingredients until smooth.
To form rolls, punch dough down, and turn it onto a lightly floured surface. Divide in half. Roll one half into an 18 x 7 rectangle. Spread half the filling to within ½ in. of the edges. Roll up jelly-roll style, starting with a long side. Pinch seam to seal. Cut into 12 slices and place cut side down in a greased 9 x 13 casserole dish. Repeat with the remaining dough and filling.
Cover and let the rolls rise until doubled, about 30 minutes.
Heat oven to 350 degrees. Bake rolls for 25 to 30 minutes until golden brown.
To make the glaze, combine the ingredients and stir until well mixed. Drizzle over warm rolls, and enjoy!
Once upon a time, there was this magical world where we could safely gather in large groups and enjoy each other’s company while we shared fancy foods and strong drinks. But then darkness befouled the land, and those visits became virtual.
While I’m not missing the commute to see our friends in the Cedar Valley, I am missing their company and the ability to share tasty treats with them on a semi-regular basis.
Some foods are just better shared with friends, and only partially because having that many calories in the house is a terrible idea. However, this week’s decadent loaded baked potato dip sounded too delicious to wait until we can again share physical space with our friends.
Loaded baked potato dip ingredients.
It was pretty easy to make, and honestly, it wasn’t much of a challenge for two people to eat it over a few days, though I’m not sure that was the healthiest move. But it was a tasty choice.
As its name suggests, it’s a mix of potatoes, bacon, cheese, sour cream, and green onions. To make it slightly healthier, I did serve it with sweet pepper wedges and bread, rather than a saltier vessel. Still, you could taste extravagance in every wonderful bite.
2 ¼ lb. Yukon gold or other small potatoes, quartered
Salt
4 slices bacon
10 oz. cream cheese, softened
1 ½ c. shredded sharp cheddar
½ c. sour cream
2 to 3 green onions, chopped
½ t. garlic powder
Bread and/or sweet peppers, for serving
Directions
Heat oven to 425 degrees.
In a large saucepan, bring a lightly salted pot of water to a boil and then add the potatoes. Cook, covered, for 15 to 20 minutes, until tender, and drain.
Meanwhile in a large skillet, cook the bacon over medium heat until crisp. Remove bacon to drain on paper towels. When cool enough to touch, crumble bacon, reserving about 1 T. for topping.
In a large bowl, mash the still warm potatoes, add the remaining bacon, cream cheese, 1 c. cheddar cheese, the sour cream, green onions, and garlic powder. Stir to combine.
Spoon mixture into a 9- to 10-inch cast iron skillet. Bake the mixture for 20 to 25 minutes or until heated through. Remove from heat and turn on the broiler.
Top the potato mixture with the remaining ½ c. cheddar cheese and the reserved bacon. Broil 4 to 5 inches from the heat for about 1 to 2 minutes, until the cheese is melted and bubbly. Serve warm with the bread and/or peppers, and enjoy (even if it’s just you, treat yourself!)!
It’s a little early to be breaking out the icebox pies, but life’s too short (especially now) to wait for summer.
So, I took the chance in mid-April to enjoy some strawberry lemonade.
Thanks to the delightful series of pies I discovered on Taste of Home (I will be making more), I got to enjoy this wonderfully simple, extremely tasty pink lemonade pie.
Pink lemonade pie ingredients.
All the more delightful, and new to me, it was made with a saltine crust. Just a sleeve and a half of saltines, a bit of sugar, and some melted butter; it’s like a graham cracker crust only salty and savory and extra sumptuous. I will be using it again, in both savor and sweet pies.
Like most icebox pies, this was quick and easy. You’ll likely still need to brave the grocery store for some of the ingredients, though many items are household staples. Namely, most of us—I don’t think—have 2 packages of cream cheese, unflavored gelatin, or 2 cups of (frozen or fresh) strawberries on hand.
However, with just a handful of extra ingredients, a little work, and a few hours of waiting, you’ll be able to have a little slice of heaven, even in self-isolation.
Pink, pretty, perfect.
Here’s what I did, following the recipe with the exception of a little extra lemon:
Ingredients
~60 saltine crackers (about a sleeve and a half), coarsely crushed
1 c. sugar, divided
1 stick (½ c.) butter, melted
2 c. sliced strawberries (fresh or frozen, thawed if frozen)
Juice from 1 lemon (~2 T.)
Zest from 1 lemon (~2 t.)
¼ c. cold water
1 envelope unflavored gelatin
2 packages (8 oz each) cream cheese, softened
½ c. heavy whipping cream
Directions
Heat oven to 350 degrees. In a medium bowl, stir to combine the crushed crackers, ¼ c. sugar, and the stick of melted butter. Use the bottom of a glass or your hands or something flat-bottomed to press the saltine crust into and up the sides of a 9-inch skillet. Bake until set and golden at the edges, about 15 to 18 minutes. Cool completely.
Combine strawberries, ½ c. sugar, lemon juice, and lemon zest, and let stand 10 minutes. Meanwhile, in a small bowl, sprinkle gelatin over the cold water, and let stand 5 minutes. When ready, transfer the strawberry mixture to a blender or food processor, and blend until smooth. Microwave the gelatin mixture for about 10 seconds, and then stir into the strawberry mixture.
Meanwhile, beat cream cheese and the last ¼ c. of sugar together until smooth. Gradually add in the cream, and then the strawberry mixture. Beat until well combined.
Pour the filling into the crust, and refrigerate covered until set, at least 2 hours and up to overnight, and then enjoy!!
During my year of bread, babka — or the similar povitica — was always on my list but I was too afraid to spend the time needed to make this beautiful treat.
Fate tempted me back when I found a wonderful looking babka recipe in my Cook It In Your Dutch Oven cookbook from America’s Test Kitchen.
I won’t lie, it’s a multi-day affair. That bothers me less now that I work your standard 9 to 5 with weekends free. But it does take some planning, say, when you’re scheduled to have 3 hours of your afternoon spent at the theater with Avengers: Endgame.
Forgot an ingredients photo but here’s my table with the 18 x 24 dough covered in filling, pre-roll.
Even with that, I found it to be worth the effort. So much so that I made it two weeks in a row. (I may have also seen Endgame two weeks in a row.)
Mostly I just wanted to try to redo the recipe with my favorite filling. I know, I know it’s sacrilege to think there’s something better than chocolate, but I frickin’ love cream cheese filling.
The second time worked slightly better in some ways, but I think that’s mostly just the nature of breads. Sometimes the mix needs some tweaking.
My first attempt had the stand mixer get the dough perfectly concocted in well short of the 10 to 12 minutes recommended, so I stopped it. But that meant that I had to let my dough rise for longer because the yeast didn’t activate as well. The second time it was sticky and slow like it was supposed to so everything rose well.
The second time my filling was softer because I probably could have used a little more cream cheese. (I replaced 12 oz. of chocolate chunks/cocoa with 8 oz. cream cheese, and I think 12 oz. may have made a better, thicker consistency, but it still worked.) The first time it was smooth and just stiff enough to spread and keep a nice firm shape.
Either way, as long as you’ve done a handful of breads before, I think anyone can make this one. It wasn’t even *that* hard to make it look pretty.
The creamy cream cheese one.
The gooey chocolate one.
Here’s what I did:
Ingredients
For Dough
4 c. all-purpose flour
1 T. yeast (The recipe calls for instant or rapid-rise, which I didn’t use. If you knead well in the stand mixer, it didn’t seem to matter. I had a good rise the second time.)
1 t. salt
1 c. whole milk (I used 2% the second time and didn’t notice any major differences.)
½ c. granulated sugar
4 large egg yolks
2 t. vanilla extract
2 sticks (16 T.) butter, softened
For Chocolate Filling
4 oz. bittersweet chocolate, chopped
1 stick (8 T.) butter
6 T. unsweetened cocoa powder
½ c. confectioners’ sugar
2 large egg whites
For Cream Cheese Filling
8 to 12 oz. cream cheese, softened
1 stick (8 T.) butter
½ c. confectioners’ sugar
2 large egg whites
For Finishing
1 large egg, lightly beaten, with 1 T. water and pinch of salt
Directions
For Dough
Whisk together flour, yeast, and salt, in the bowl of a stand mixer. In a separate bowl (that holds at least 4 c.), mix together the milk, sugar, egg yolks, and vanilla, until the sugar has dissolved. Use a dough hook attachment on low, and begin to slowly add the milk mixture to the flour mixture, and continue to mix until the dough starts to form.
Increase the speed on the stand mixer to medium-low, and add the 2 sticks of butter 1 T. at a time, until the butter is fully incorporated, about 3 to 4 minutes. Continue to knead in the stand mixer for another 10 to 12 minutes until the dough is smooth, elastic, and clears the sides of the bowls. (Like I said, this happened within a couple minutes the first time, and I should have kneaded by hand for longer instead of stopping when a clump formed, but the second time it was definitely too sticky to handle until about 10 to 12 minutes, and I even added a titch more flour.)
Transfer the dough to a lightly floured counter and knead by hand for about 30 seconds and form a smooth, round ball. Place the dough, seam side down, in a large greased bowl. Cover and let rise by about half for 1 ½ to 2 hours. Once risen, refrigerate dough until it is firm, at least 1 hour to up to 24 hours (an ideal time to go watch a long action-packed superhero movie). Let rest at room temperature for 15 minutes if you refrigerate for much longer than an hour.
For (either) Filling
Microwave the chocolate chunks, cocoa, and butter OR the cream cheese and butter in a medium bowl for about 3 minutes at 50 percent power, stirring often, until the mixture has melted and a smooth, soft filling forms. Add the confectioners’ sugar, and then let cool for about 30 minutes. Then, whisk in the egg whites, until fully combined and the mixture looks glossy (less noticeable with the cream cheese filling, so mix well).
To Combine
Press the dough down to deflate, and then transfer to a lightly floured counter (I had to use my whole damn kitchen table so make sure you have space). Roll dough into an 18 inch by 24 inch rectangle, keeping the shorter side parallel to the counter. Once rolled out, spread the filling on the dough, leaving about a ½ inch border around the edge.
Roll the dough away from you into a firm, taut cylinder. Pinch to close the seam. Wrap in plastic and refrigerate (on a large baking sheet if possible but mine weren’t big enough so I just cleared a space on a shelf) for about 30 minutes.
To Finish
Meanwhile, make a foil sling for the Dutch oven by folding in half 2 long sheets of aluminum foil, so you have 2 long, roughly 7 inch sheets. Place sheets perpendicular to each other, like a lowercase t, and carefully smooth down into the Dutch oven bowl. Spray with a little bit of oil.
When dough is ready, transfer the log back to the lightly floured counter with the short end facing you. Carefully cut the dough in half lengthwise so that you will have the swirls of filling facing up to you. Pinch together the two dough halves and then braid end over end, as tightly as possible. Pinch the second end together, and then wrap into a spiral with the ends tucked underneath.
Put the dough in the prepared Dutch oven, and let rise for another 1 ½ to 2 hours.
Heat the oven to 350 degrees, and brush the egg mixture on top of the dough.
Cover pot, and bake for about 20 minutes. Uncover, rotate pot, and continue to bake for another 35 to 45 minutes, until the loaf is a deep golden brown.
Lift dough out of pot using the foil overhang, and let cool completely (about 3 hours) on a wire rack, and then finally, enjoy!
After two weeks of traveling, I’m finding it nice to be home. And one of the surest signs that we’ve been on the road too much (and that I’m officially grown up) is that I got burnt out on fast food. Yes, I was craving salad and vegetables.
Of course, I do not need to be nudged too hard but the need for healthier fare hit like a craving. So, I was glad I had saved this quiche recipe for a post-travels dinner.
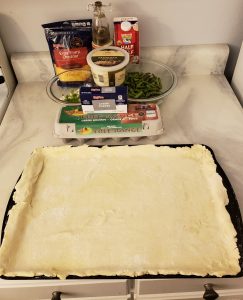
Sheet pan quiche ingredients.
It isn’t all healthy, what with an all-butter crust, cream cheese, and more cheese. But it was topped with my comfort food veggies, marinated artichokes and asparagus. And eggs, well, I think the jury is still out on whether they’re healthy or not. For the sake of this post, let’s say they’re a good source of protein.
Plus, I was happy to have another reason to make a pie crust in this year of sheet pan recipes.
The recipe was adapted from food blogging fave Smitten Kitchen. But I chose my favorite vegetables over spinach (which is a fine green!) and had to tweak to fit my size sheet pan (roughly 11×15 inch). All worked out perfectly and I found a relatively simple recipe I am sure I’ll be returning to again and again.
Look at those beautiful vegetables and that perfect crust.
Here’s what I did:
Ingredients
For crust:
2 sticks butter
Scant 2 c. all-purpose flour, plus more for rolling the dough
3 oz. ice water (I used a handy shot glass and shaker, don’t judge)
Salt, if desired
Or, feel free to roughly double your favorite pie crust.
For quiche filling:
1 brick (8 oz.) cream cheese, softened
1 c. half and half
7 large eggs
1 bunch scallions, thinly sliced white and light green parts
About ¾ bunch asparagus, ends removed and cut into about 1 ½ inch pieces
1 (about 6 oz.) jar of marinated artichokes, drained
1 c. grated sharp cheddar cheese
½ c. grated Parmesan cheese
Salt and pepper, to taste
Oil, for coating
Directions
Prepare crust. Use a food processor, pastry blender, or hands to mix together the butter and flour until well blended. Add water slowly until dough forms. Pat into a disk, wrap in plastic, and refrigerate for about an hour. When ready, roll out the dough on a lightly floured surface to about ¼ inch thick and slightly larger than the size of your sheet pan. Carefully place the dough in the sheet pan and trim the edges as necessary. Freeze for about 20 minutes.
Heat the oven to 425 degrees. Then, when ready, pierce the cold dough throughout with a fork. Cover dough with a lightly oiled piece of aluminum foil. Add weights. (I forgot this step and all turned out fine.) Bake for about 20 minutes until partially done, and then remove foil (and any pie weights) and bake for another 3 to 5 minutes to lightly golden the crust.
Meanwhile, make the filling. I was lazy here and used my stand mixer, but do what works for you. Beat the cream cheese in a large bowl. Carefully add the half and half. Whisk in eggs one at a time, until combined. Stir in the scallions, cheeses, and salt and pepper.
Once crust is ready, pour on the egg mixture. Do not overtop the crust (this amount of egg mixture worked perfect for my sheet pan, but amounts and sheet pans vary). If you have extra, consider you’ve got breakfast in the morning.
Top egg mixture with asparagus pieces and quartered artichoke hearts.
Reduce oven temperature to 350 degrees, and bake the quiche until the crust is fully golden and the eggy filling is set, about 25 to 30 minutes. Cool for at least 10 minutes or until warmed to desired temperature, and enjoy!
I’m starting to sound like a broken record, but for the third week in a row, I was in search of a recipe that was easy and quick. In fact, this is the first time this year that I made this week’s recipe on the same day I posted my blog.
Like any (recovering) journalist, I live for a deadline.
Thankfully, I picked another recipe this week that not only was as simple as it seemed but came together with little effort. I needed the latter after losing an altercation with a cat that has left my right hand only partially usable.
Strawberry shortcake bars also happen to be delicious and the kind of treat that will please my in-laws as we head to St. Louis this weekend to see them.
Strawberry shortcake bars ingredients (sans flour because I keep it in a big honkin’ container because I use that much).
Everything’s coming up Christinia!
Because I’m cutting it down to the wire (again), two quick notes on this recipe:
It’s pretty strong on the shortcake, which I like, but it may be a bit dry for others’ tastes. If that’s not your thing, maybe cut down on the flour or add a little more whipped cream to the topping.
It doesn’t specifically call for it, but a stand mixer works really well for this recipe. Creaming both the cake and the topping is enough of a pain when one’s hand is healthy but it was pretty much a requirement for me this week. A hand mixer would also work, but I really appreciated saving the labor this week.
Fresh from the oven (and cooled) and it was amazing.
Here’s what I did, mostly following a recipe I found randomly online:
Ingredients
For the bars:
1 c. (or 2 sticks) unsalted butter, plus a little more for coating the sheet pan (I used to use salted but we’re *trying* to be healthier)
2 c. sugar (like I said, trying)
4 large eggs
2 t. vanilla
5 c. all-purpose flour
1 t. salt
½ t. baking soda
For the topping:
8 oz. cream cheese, softened
1 c. powdered sugar
1 t. vanilla
1 c. heavy whipping cream, whipped (or 8 oz Cool Whip but I like real cream, again, trying)
About 1 lb. strawberries, sliced
Directions
Heat oven to 375 degrees, and grease a large rimmed sheet pan.
In a large bowl, cream the butter and sugar until fluffy. Then, add the eggs one at a time until well incorporated. Add in vanilla and stir until combined.
In a separate large bowl, mix together the flour, salt, and baking soda. Add to the wet mixture and beat until combined. (The dough will look like cookie dough.)
Spread the mixture on the sheet pan, using greased hands to spread evenly onto the pan.
Bake shortcake for 10 to 15 minutes until golden.
Remove from oven and let cool.
Meanwhile, mix together the cream cheese, powdered sugar, and remaining vanilla. Beat until smooth. Fold in the whipped cream, and chill until the bars are cool.
Spread the cream mixture on top of the shortcake, and then cover with the sliced strawberries. Eat immediately, or chill until ready to serve to in-laws, and enjoy!
So, I didn’t make this recipe recently, but I couldn’t resist a Polish post to celebrate Casimir Pulaski Day.
Since I grew up in Illinois, there were two extra holidays we got each year. They were Abraham Lincoln’s birthday (of course in the Land of Lincoln, we celebrated the 16th president individually), and Casimir Pulaski Day.
Pulaski isn’t celebrated much outside of Illinois, but he was a Revolutionary War hero from Poland and is credited as a founder of the U.S. cavalry. And he seems like a pretty cool and worldly dude.
Usually I try to make something each year to celebrate my Polish roots and celebrate the Illinois holiday. This year I didn’t have my [expletive deleted] together to get something Polish together in time for today’s holiday.
Fortunately, I made bialys a few years ago in my previous life as a newspaper reporter, and the little not-bagels are made on a sheet pan.
Bialys, a tasty Polish treat
So, here’s a little recipe extra for loyal readers:
Ingredients
For the starter or polish
½ c. all-purpose flour
1/3 c. water
¼ t. active dry yeast
For the bialy dough
1 starter
1 ½ c. warm water
2 ½ t. active dry yeast (or one package)
1 ½ T. honey
2 T. olive oil
1 ½ t. salt
3 c. bread flour
1 c. all purpose flour
For the bialy filling
5 cloves garlic, minced
2 medium onions, chopped
2 T. oil
2 T. poppy seeds
Salt, to taste
Directions
The night before you plan to make the bread, make the starter before going to bed. Stir together the flour and yeast. Mix in the water until a sticky dough forms. Cover and let rest overnight.
When ready to make the dough, mix together the yeast, water and honey. Let the yeast activate for about 15 minutes. Then, add the starter, olive oil, salt, all-purpose flour and about 2 c. of the bread flour.
Turn out on a floured surface, and knead, adding in the remainder of the bread flour as necessary. Knead for about 5 to 10 minutes.
Place dough in a large bowl that has been coated with oil. Over with oiled plastic wrap and let rise in a cool place for about 2 hours.
Once dough has about doubled in size, punch it down in the bowl and then divide it into about 20 even pieces. Roll each dough piece into a ball and then stretch out to about a 3-inch round. Place round on floured baking sheet and indent around the middle, leaving about a 1-inch lip around the edge. Repeat with remaining dough pieces, leaving enough space in between dough rounds so the bialy can rise a second time.
Cover with oiled plastic wrap or a tea towel and let rise for about 1 hour.
Preheat oven to 450 degrees.
During second rise, mince garlic and chop onion. Pour oil into large cast-iron skillet and let warm over medium heat. Once hot, add in onions and garlic and cook for a few minutes before turning heat to medium low. Cook for 20 to 30 minutes over medium-low heat, stirring occasionally until caramelized. Once browned, remove from heat and add in the salt and poppy seeds.
Once second rise is complete, add ½ to 1 T. of the filling into each of the bialy indentations until it’s all used up. Place baking sheet (or sheets) into oven and cook for 12 to 15 minutes. Enjoy warm and with cream cheese!
Some years ago at a dinner party, a friend broke out these incredibly delicious treats that looked so fancy. Then, she told me what was in them, and I have been hooked ever since.
You see, these delicious, gorgeous snacks had just three ingredients — fillo dough shells, cream cheese and jalapeno jam.
Ingredients for this unnamed treat
It was so easy. I couldn’t resist stealing the recipe and using it to impress other friends.
But there was just one problem. At the time, one of those ingredients was not so easy to come by, and in fact, her jalapeno jam was homemade. But nowadays, you can find many different store-bought brands that are quite good. I’m partial to the Tabasco brand.
Since then, I’ve used the snacks to dazzle family and friends alike.
Whenever I need to bring something to a potluck or gathering and I have no time, this is my go-to. In fact, I made them this past week specifically to take to a game day with friends when I hadn’t planned in advance enough to bring something else.
Fortunately, too, it was back in Waterloo so I had occasion to let the cream cheese soften during the drive.
Treats were made under duress so not as pretty as they could be. They still taste good, though.
Now, not that you dear readers need it for this treat, but here’s what I did:
Ingredients
2 packages fillo dough shells (about 30)
1 (8oz.) cream cheese package, softened
Pepper jelly (I use about half of a 10 oz. jar)
Directions
Heat oven to 325 degrees. Place fillo shells on a sheet pan — any size will do as long as all the shells fit. Put the cream cheese into the shells — I prefer to put the cream cheese into a gallon bag, cut of the tip of the bag and squeeze the cheese in like an icing bag but you do you. Carefully spoon the jelly on top of the cream cheese.
Bake for 12 to 15 minutes until the cream cheese and jam are warm. Put on a fancy-looking plate, pretend you were hard at work, and let everyone enjoy!